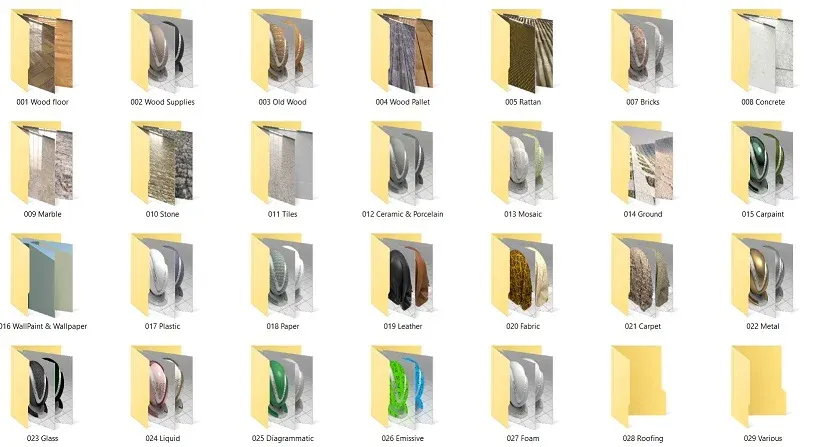
خامات فيراي لبرنامج اسكتش أب
Vray Materials for SketchUp
خامات فيراي جاهزة للتحميل والاستخدام مباشرة على برنامج اسكتش أب


Tips and Tricks for Sketchup Materials
Today I'm going to expose you a few tips and tricks for Sketchup materials and additionally some basics of Vray materials. Here's a listing of what I'm going to cowl on this video, I'm able to additionally offer timestamps for each phase inside the description box under, so that you can pass to any section you need. With that stated, let's get started out number one, making use of substances to begin making use of substances, you want to apply the Paint Bucket tool.
Now in case you're new to Sketchup, your setup would possibly appearance a bit exclusive from mine you might have the tools in one-of-a-kind places, however do not worry approximately that. Simply search for this icon, or you could definitely Press B for the Paint Bucket. Your cursor will then trade to a paint bucket, and the materials window will pop up.
This window has a library of materials this is blanketed when you first mounted Sketchup, from here you may pick out whichever material you like and click on a face or a set to paint it. Wide variety , painting businesses/additives vs Faces whilst you create a new element in Sketchup, it's going to have a default material, that's white for the front face, and bluish-pink for the returned. Portray a selected material to a face or faces will override that default fabric. Also notice that the default material may be selected here if wished. When you have a collection or factor and you are painting it from the outside, all of the faces assigned with the default cloth will trade.
However, if you edit it, you may change the cloth of a specific face within that group. Now if you go out the edit mode, you can still alternate the group's default cloth however any faces that aren't assigned the default cloth will live the way it's far. I've mentioned agencies and components, so what is the difference among them? Well, i am going to explain this by telling you a tale that is Steve and his dual brother Jeff my call is Jeff and their final name is green. And this is Bryan and his dual brother Blake Cooper the difference among these two households is that the Coopers are telepathic. Despite the fact that Steve and Jeff are quite tight bros, they do not have that connection. So, whilst Steve adjustments his shirt, Jeff would not do the same.
However alternatively, Bryan and Blake have that incredible electricity in order that they understand what each different are wondering, so while Blake changes his shirt, Bryan does the identical, now they have a connection for the reason that greens group, and the Coopers are components. Which means that making adjustments to a set will no longer have an effect on its copies. On the other hand, any adjustments you are making internal a element will affect all other instances of that factor, however, any modifications outdoor of it's going to now not have an effect on its copies.
In some cases, you need to create precise copies of a issue and prevent it from linking to the authentic. In that case then you could choose the one which you'd want to make particular, proper-click it, then click on Make precise. Now you may edit this factor without affecting the unique or vice versa. This additionally works on more than one copies of that element. For example, i will make those automobiles precise, so that they nonetheless hyperlink to every different,
however now not to the originals. Wide variety three, developing a fabric to create a brand new fabric, first carry up the cloth window, then click on this icon right right here. When you click this icon, a new window will pop up, and you may select a shade using the coloration Picker here. If you need to apply a texture, then take a look at this container, now you could locate and pick the texture that you need to apply. You could additionally alternate the width and peak of the feel here. And the opacity of it here. Range 4, enhancing a fabric you can edit any current cloth within the version by using first deciding on the material which you want to exchange, and then visit edit mode. Just like the developing fabric window, his has the identical options wherein you can choose the color, texture, and trade its width, peak and opacity to some thing you like.
The only variations among the edit mode and create mode are those buttons right right here. One lets you pattern the coloration on an item, and the alternative helps you to sample any shade on display screen. So, if I need those windows to have this inexperienced heritage color or this sky-blue color as an instance, then I can without problems accomplish that through using the two buttons.
Variety five, uploading Sketchup substances in case you don't need to address SketchUp’s crappy default substances, then right here are some approaches to import your very own materials. In a sense, importing materials is a faster manner of making cloth approach
number one: The Import First, visit record, Import Then select the feel/cloth which you need subsequent, left click on a corner of a surface to select the anchor point and circulate the mouse to size it, finally, left click on again to complete technique range : The Drag and drop in case you drag and drop a texture into Sketchup, it's going to are available as an picture. What this indicates is that you cannot do something to it besides circulate, scale, and rotate it. See how i am seeking to sample the paint but Sketchup would not let me. In case you want to apply it as a texture, then simply proper click, explode, and now you could pattern and use it to color your geometries.
Technique range three: The replica and paste any other manner is to copy and paste a geometry with the cloth from every other model for instance i have a reference model on the left facet, and my new model at the right. I will certainly copy and paste the geometry with the material I need from one window to another and now i'm able to sample paint from there.
Variety Six, uploading Vray materials To import Vray substances to SketchUp; first, press the M button on the Vray Toolbar to carry up Vray material Editor. Notice that the Vray toolbar may be discovered here if it isn't always for your setup already. As soon as you have got the fabric editor opened, proper click the Scene substances, load cloth and just locate and pick visas or vomits documents. As soon as completed, just pick out the material from the list and start painting away. In case you pick out the fabric and click on right here, you may preview how the material will appearance as soon as it is rendered, i am going to bring up the paint bucket and test it out. Well, it truly is ordinary it indicates up black on the model area however it seems nice once rendered.
This is without a doubt a small glitch that happens from time to time while Vray cannot locate the supply of the texture. In case you just reload the texture report like so, it's going to show up efficiently in Sketchup. Additionally, if you want to create your own Vray materials, then this window is where you could do this. I am now not going to go over it today, due to the fact that is a lengthy issue. Additionally, there are such a lot of sources available wherein you can get loose Vray substances. Why spend time making some thing whilst you could just get it for free
range Seven, materials assets talking of free stuff, right here are a few resources for Sketchup and Vray materials. You could pause the video proper now and take a look at them out or visit the hyperlinks within the description field underneath we're greater than half way thru the video so I'm going to get a few water, meanwhile, revel in this time-lapse!
Quantity eight, making use of materials to Curved surfaces making use of a texture to a curved surface is a touch trickier than it's miles to a ordinary floor Curved surfaces in SketchUp are composed of many directly surfaces. What does that imply? As an instance, when you draw a circle, you may surely see that it's manufactured from many smaller segments. So, while it is extruded the circle turns into a cylinder this is made from smaller faces. It truly is why occasionally whilst you import a three-D model to SketchUp, it'd have a ton of needless lines which make it tough and time-consuming to use fabric to the object. No longer simplest that, it'd affect the very last consequences as soon as rendered. If you need to apply fabric to curved faces with difficult edges like this, you may first pick all of the geometries proper click on, soften edges, regulate the values a bit, and now you've got a cleanser object that you may easily observe material to.
Quantity 9, Repositioning Textures sometimes whilst you import or paint a texture, it won't be on the right size or within the role which you need, here's how to resize and reposition it. Click at the face of the texture which you need to edit, right click on and visit Texture-&SketchUp. Here, you will see 4 different pins. Click on a pin to lift and reposition it. Click and DRAG a pin will transform the feel in special methods. The red pin is the anchor and will assist you to reposition the feel The green pin is for Rotating and Scaling the feel proportionally The Blue pin will shear and scale the feel inside the route you drag it And the Yellow pin will distort the texture additionally, proper clicking will come up with options to rotate, flip and reset the feel. The fixed pins are very beneficial for applying a distorted texture to a floor. What do I suggest by using that? Shall we say I need to use this door cloth on this photograph to the item at the left, but it would not show up efficiently due to the fact the photo become taken at an perspective. To repair this, I first want to click on the fabric, visit texture, role. Now proper click on again and uncheck constant pins. Sketchup will now come up with 4 popular yellow pins. What you want to do now's flow these pins to every nook of the door texture. Now you may drag each pin to the corner of the geometry and growth, there you've got it.
Number Ten, using Projected Textures every so often you will be coping with surfaces which are greater complex than a simple extrusion, and it would have an effect on the way your texture suggests up just like this. If it's the case, you then must do not forget using this approach to paint that geometry. First, create a surface that lines up with your curved floor Now observe the feel and ensure it's placed efficaciously right click on and pick Texture-Projected Then sample the feel and paint the curved surface once more Bam, constant it.
Number 11, changing materials let's say after you've got applied substances to the model, and you found out that it does not appearance as right as you idea it might. Now you are trying to parent out how to fast replace all of those formerly implemented fabric with out doing it one at a time by means of one with the aid of once again due to the fact permit's be honest here, isn’t nobody were given time for that she*t. There are a couple of ways to paint multiple faces at once *Tip: ensure you do now not have any faces selected whilst the use of those shortcuts CTRL click All connected faces with matching paint will alternate this will exchange all adjacent faces CTRL click on All faces in the identical object with matching paint will alternate this could paint all matching faces at the identical object Shift click on All faces inside the whole model with matching paint will trade this will paint all matching faces inside the whole model despite the fact that I said Shift click will paint all matching faces within the whole version, this man over here would not change, why is that? It is because this object is a set so that the faces in there do not get affected.
Number Twelve, Matching material positions to multiple Faces every now and then the positions of the equal material don't match whilst it is implemented to more than one faces. To suit their positions, clearly bring up the Paint bucket, then hold down Alt and left click to pattern a face with efficaciously located texture. When you sample the fabric, use it on the opposite faces. You may additionally use the shortcuts from the preceding tip to healthy fabric positions of more than one faces.
Range 13, changing Sketchup fabric with Vray cloth commonly after I observe materials to a model, I regularly use Sketchup substances from the start because it's more convenient. But now and again Sketchup substances do now not render as well as Vray materials specially for glass substances inclusive of this one. So, once I need to use Vray materials of their location, there’s a totally easy manner to do this. First convey up the paint bucket tool and keep down Alt then left click the Sketchup cloth that you need to replace with Vray material. Then go to Vray fabric editor you may now see that fabric decided on within the list. Now proper click on and import the Vray material that you want to use. You could then press the preview button to see what it's going to look like as soon as it's rendered.
Wide variety Fourteen making use of a material to a Layer sometimes whilst you import a model to Sketchup, it is probably organized through layers, like this version that i have imported from Revit. There's a trick that uses these layers as a way to use substances to the version. Shall we embrace I want to use a wooden fabric to this residue that consists of all of the doorways in the version, i can first visit the Vray material Editor, then choose the cloth that I need to use, proper click on, apply fabric to layer, then choose the Layer that I want and press good enough. ok, nicely Sketchup crashed, allow's attempt it again. What the nicely, you realize what, simply don't use this tip, in case you want to realize the way to efficiently follow materials to an imported version then simply watch my ultimate educational.
Quantity Fifteen fashion modifications the way you see materials No no longer style but Sketchup style in case you don't have the styles toolbar on your setup, it can be accessed thru going to View Toolbars-take a look at the styles field Wireframe This shows simplest the strains within the model. Hidden Line will show the model with none shading or textures coloration will color faces to simulate a mild source Shaded with Textures is quite a good deal Shaded however with textures Monochrome will display faces with the default back and front face coloration. And these two are toggles. X-Ray will make all faces obvious so that you can see through your model returned Edges will displays edges which might be hidden with the aid of different edges or faces also if you need to trade the default materials then you may go to style and trade the shade to something you need, as an instance i will make the default shade for the the front face yellow and the lower back face even greater crimson. There's plenty extra approximately patterns, like the way you customize them extra by using going to the styles Window however I may not go into that nowadays because this video is extra approximately substances.
And all you want to know is that Sketchup patterns can alternate how materials are displayed to your version. So, if the subsequent time you open the version and see that each one your textures are long past, don't freak out, just check and make sure which you have the proper style grew to become on. And that is all I've for brand new. When you have any questions simply allow me know in the remark segment below. I'll see you guys, subsequent time.
اذا اعجبك الموضوع ادعمنا بالمشاركة على شبكات التواصل الاجتماعي واترك تعليقاً بسيطاً يوضح تقييمكم للموضوع